Installing Git for Windows
If you’re new to Git and development tools, installing Git for Windows can feel daunting. This guide walks through each step of the installer so you know what every option means and what to choose.
Do I need Git? You can skip this if you downloaded the project as a ZIP from GitHub. Git gives you an easy way to update the project later (git pull), but it’s not required to use Net Worth Navigator.
Download
Section titled “Download”Go to git-scm.com and click the Download for Windows button. The download should start automatically.
Run the Installer
Section titled “Run the Installer”Find the downloaded file (it will be named something like Git-2.x.x-64-bit.exe) and double-click it.
Run as Administrator? The installer will work whether you run it as Administrator or as a regular user. Running as Administrator makes Git available to all user accounts on the machine, which is useful if multiple people use the same computer. For NWN, either choice works.
Step-by-Step Walkthrough
Section titled “Step-by-Step Walkthrough”1. Welcome & License
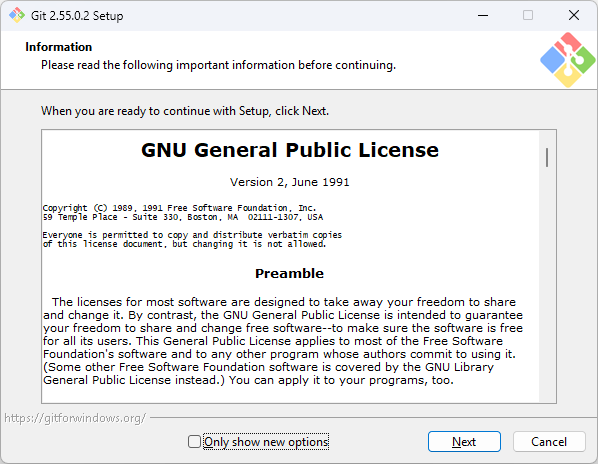
Section titled “1. Welcome & License”Click Next to accept the license and proceed.
2. Installation Path
Section titled “2. Installation Path”If you installed as Administrator, the path should read C:\Program Files\Git\. If you installed as a regular user, it will be in your user profile directory (C:\Users\YourUsername\...). Either is fine.
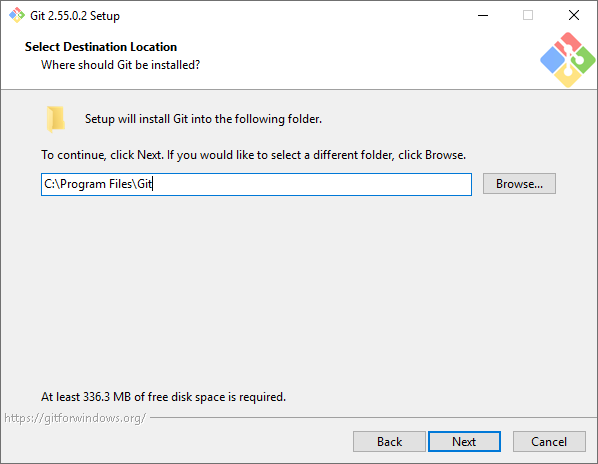
If the path looks reasonable, click Next.
3. Select Components
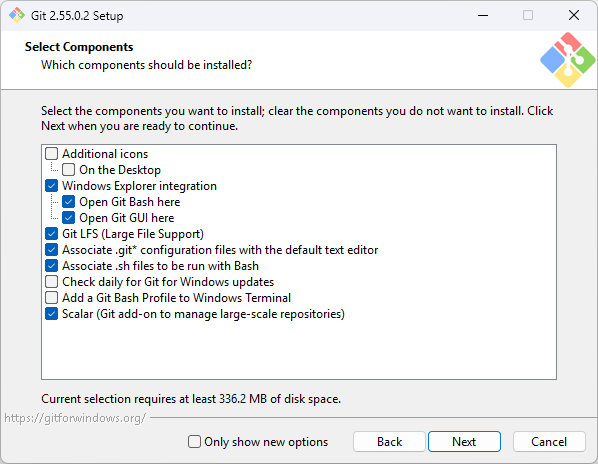
Section titled “3. Select Components”The defaults are fine. Uncheck Check daily for Git for Windows updates unless you want to be notified of new Git releases — most users don’t need this.
Click Next.
4. Select Start Menu Folder
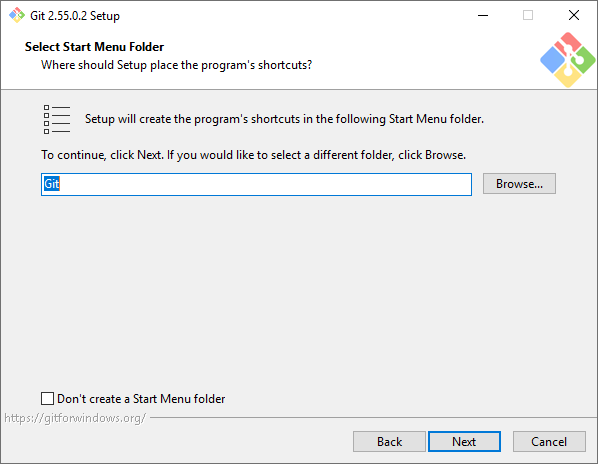
Section titled “4. Select Start Menu Folder”Unless you have a preference, keep the defaults. You can also choose to skip creating a Start Menu folder entirely.
Click Next.
5. Choosing the Default Editor
Section titled “5. Choosing the Default Editor”Leave the default selection unless you see an editor you already use and plan to use Git beyond NWN.
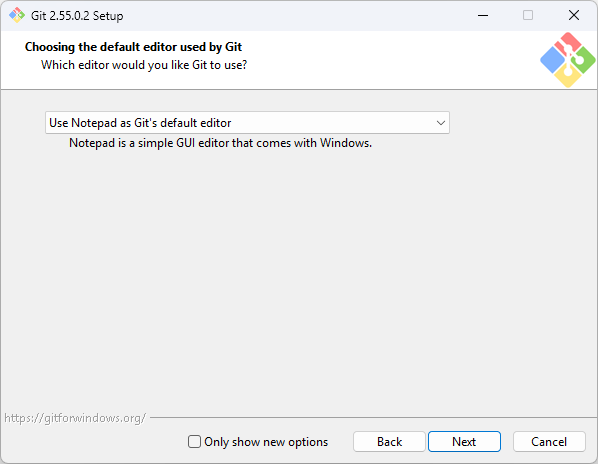
Click Next.
6. Initial Branch Name
Section titled “6. Initial Branch Name”In the Initial branch name for new repos step, type main in the field.
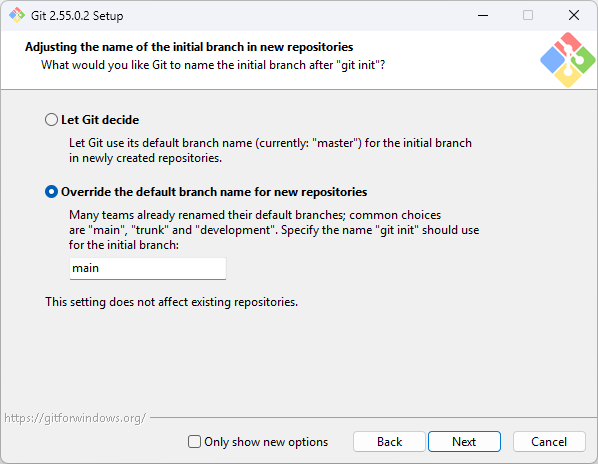
Click Next.
7. Adjusting Your PATH Environment
Section titled “7. Adjusting Your PATH Environment”Keep the default: Git from the command line and also from 3rd-party software. This is important — it makes git available in PowerShell and Command Prompt.
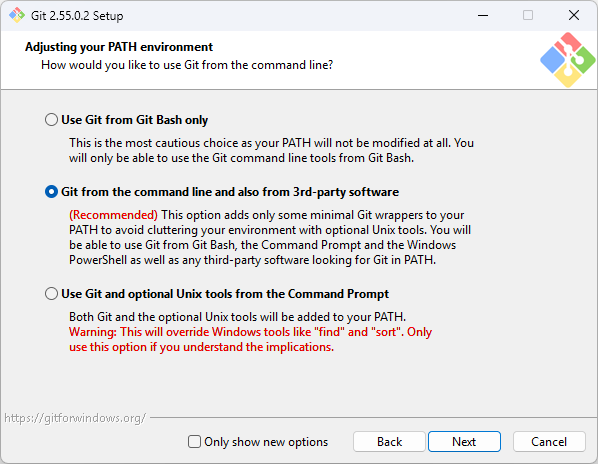
Click Next.
8. Choosing the SSH Executable
Section titled “8. Choosing the SSH Executable”Keep the default: Use bundled OpenSSH.
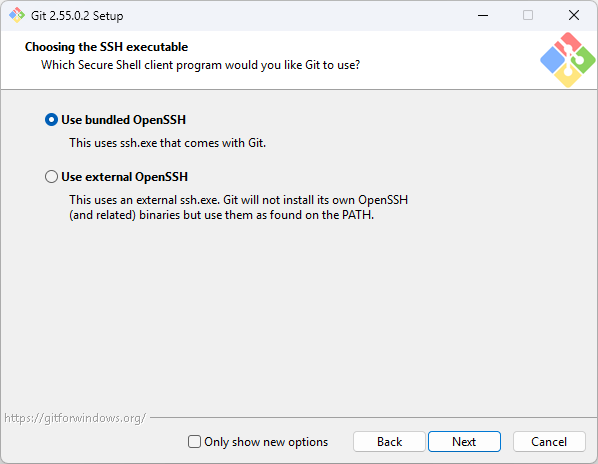
Click Next.
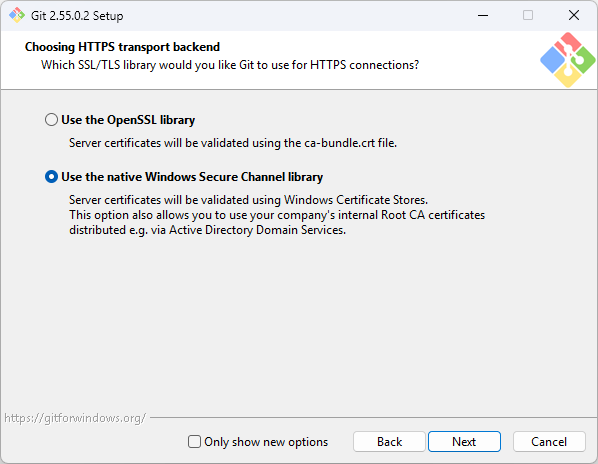
9. Choosing HTTPS Transport Backend
Section titled “9. Choosing HTTPS Transport Backend”Select Use the native Windows Secure Channel Library and click Next. This lets Git use Windows’ built-in certificate handling.
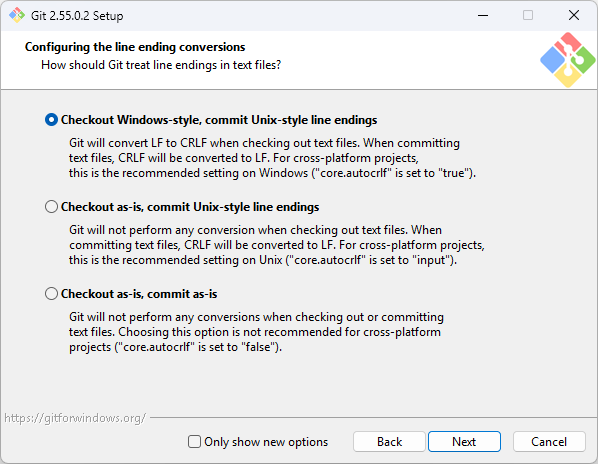
10. Line Ending Conversions
Section titled “10. Line Ending Conversions”Keep the default: Checkout Windows-style, commit Unix-style line endings. This is the correct choice for Windows.
Click Next.
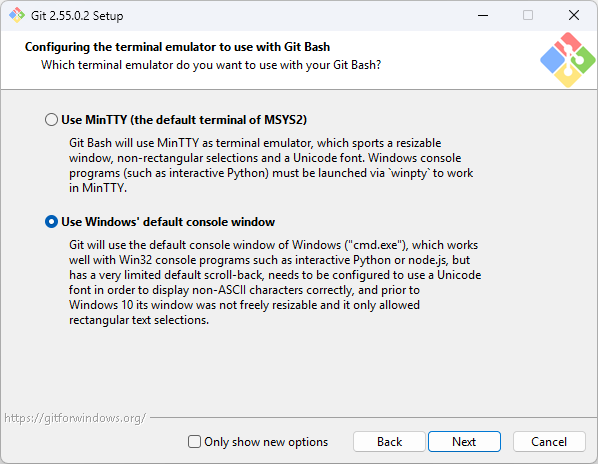
11. Configuring the Terminal Emulator
Section titled “11. Configuring the Terminal Emulator”Select Use Windows’ default console window (instead of MinTTY). This makes Git use the standard Windows terminal, which works better with PowerShell.
12. Remaining Options
Section titled “12. Remaining Options”Leave the remaining defaults through the next few screens:
git pullbehavior (default: merge)- Credential helper (default: Git Credential Manager)
- Extra options (default: enable file system caching)
- Experimental options — leave unchecked, though this may not appear on all installer versions
Click Next through each screen until you reach Install, then click Install.
Verify the Installation
Section titled “Verify the Installation”Open a PowerShell window and type:
git --versionYou should see something like git version 2.x.x.windows.1. If you see this, Git is installed and working.
If the command is not recognized: The installation may not have added Git to your PATH correctly. Try closing and reopening PowerShell, or restart your computer. If it still doesn’t work, re-run the installer and make sure you selected Git from the command line and also from 3rd-party software in step 7.
Next Steps
Section titled “Next Steps”Once Git is installed, return to the Installation guide to clone the repository and set up Net Worth Navigator.